Windows 7 Partitioning Step by Step
Partitioning in Windows 7 is made easy...
This article will show you how to shrink an existing partition or volume using the Windows 7 Partitioning tool Diskpart to create unallocated disk space, from which you can create a new partition or volume with.
Follows these steps to shrink an existing volume using Windows 7 Partitioning utility Diskpart:
Step 1. Turn on your computer, insert the Windows 7 installation DVD in your computer's optical drive or USB flash drive, and then shutdown your computer.
Step 2. Restart your computer, after the BIOS screen flashes by, press any key when prompted "Press any key to boot from CD or DVD...", as shown in below screenshot.
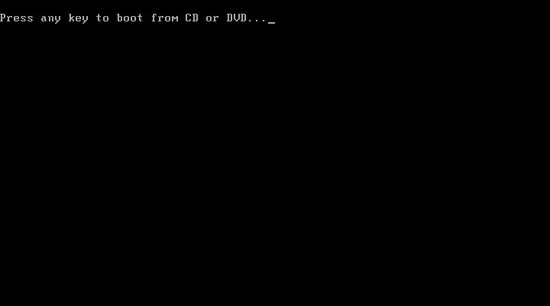
If your system does not boot from the DVD or USB flash drive, and you're not asked to press any key, you may need to change some system settings. To learn how to do this, see how to fix windows 7 installation problems.
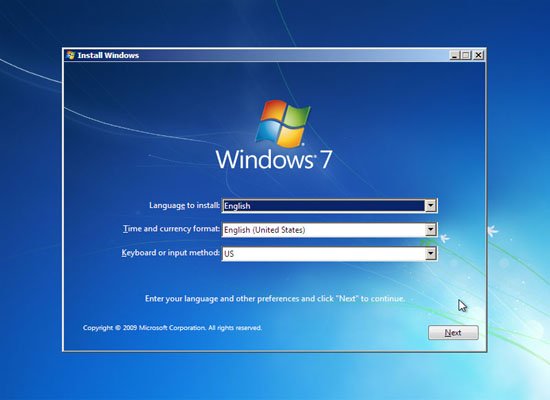
Step 3. After loading Windows 7 installation files, the Install Windows screen appears, here you can enter the language, time and currency formats. and then click Next button.
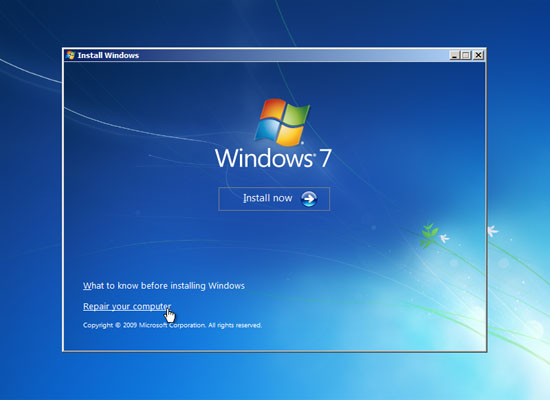
Step 4. On the next window (see screenshot bellow), don't click on Install now button, click on Repair your computer link.
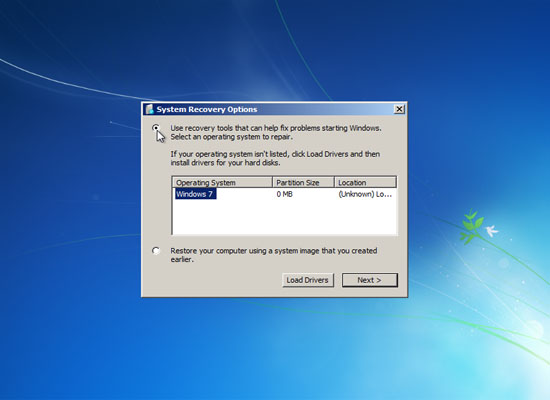
Step 5. Next you'll see System Recover Options window (see screenshot bellow), click on Use recovery tools that can help fix problems starting windows option, and then click on Next button.
Step 6. In the next window (see screenshot bellow) click on Command Prompt link to open a command prompt window to start Windows 7 partitioning.
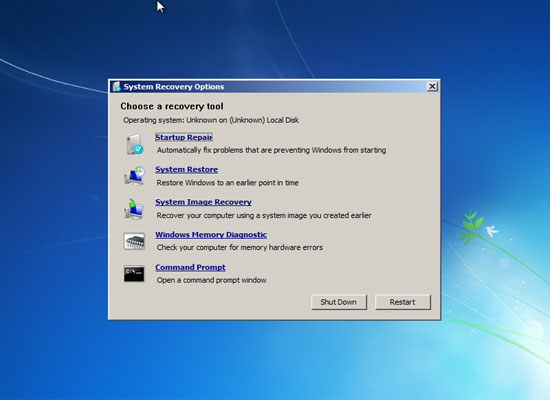
Step 7. It will show you the command prompt window (see below screenshot), in the command prompt type diskpart and then press Enter key.

Step 8. It will show you the DISKPART prompt. In the command prompt type list volume and then press Enter key.
This will display you a list of Volumes to select from to shrink, here you can see in my PC I have two volumes. (see screenshot)

Step 9. In the command prompt type Select volume 1 (Note: If you have more than one volume in your PC, make sure you have selected the correct volume number listed that you want to shrink) and then press Enter key. I wanted to shrink the listed volume 1, so I would type select volume 1. (see screenshot)

Step 10. In the command prompt type shrink querymax and then press Enter key. It will display you the maximum number of reclaimable bytes, in my PC as you can see screenshot bellow that I can shrink my selected volume to maximum 59 GB.

Step 11. To shrink all of the available space.
A) In the command prompt, type shrink and then press Enter key (Note: This command will shrink the selected volume by all of the maximum number of reclaimable bytes displayed in the Step 10 to be used for the new unallocated space.

B) Go to Step 13 to exit from Windows 7 partitioning Diskpart prompt.
Step 12. To shrink the available space by a specified size. In the command prompt, type shrink desired=(# in MB) and then press Enter key. If I wanted to shrink the volume by 50GB, then I would type shrink desired=52100 and then press the Enter key. (see screenshot bellow)

Step 13. In the command prompt, type exit and hit the Enter key. And again, type exit and hit the Enter key to close the command prompt window.

Step 14. It will display System Recovery Options window screen click Restart button , That's it.
Windows 7 Partitioning Related Articles
Partitioning Windows 7 using the Windows Disk Management GUI tool. (comming soon)
The Windows 7 Partitioning tool the Diskpart would be very helpful when you want to dual boot Windows 7 with Windows XP operating system without using a third-party partitioning program..
Top Windows 7 Articles
How to Upgrade Vista to Windows 7
How to Upgrade XP to Windows 7
How to Install Windows 7 Step-by-Step
How to Install Win7 from USB Flash Drive
Upgrade Starter to Windows 7 Home Premium
How to Auto Logon in Windows 7
How to do Partitioning in Windows 7
How to Create a Restore Point in Win7
How to view File Details in Windows 7
